
VberAI Studio: Split Game UI Design Images and Import into Unity / Godot / Cocos
VberAI Studio splits full-screen game UI design images into UI elements in place, keeps layout and sizing, and exports or pushes to Unity, Godot, and Cocos. Includes the official demo video, step checklist, and acceptance tips.
- vberai
- ai-studio
- game-ui
- game-art
- ai-generated-ui
- unity
- godot
- cocos
- tutorial
- video
VberAI Studio (≠ Google AI Studio) splits game UI design images into separate elements, keeps the original layout and sizing, and exports Unity / Godot / Cocos UI assets from the canvas in one click—from a full-screen concept sheet to importable prefab/hierarchy via an automated pipeline, without manual slicing and rebuild.
Steps: From Game UI Design Image to Engine Delivery
1. Prepare input: full-screen game UI design image
Create a new task in AI Studio. Input can be:
- A full-screen game UI generated in canvas (main menu, HUD, shop, etc.)
- Art / design mockups, visual comps, or concept sheets exported as PNG
- Any other full-screen UI design image (prefer sufficient resolution and clear button/panel boundaries)
Tip: the closer the image looks to a final one-screen UI, the easier the split; avoid vague mood boards without recognizable control regions.
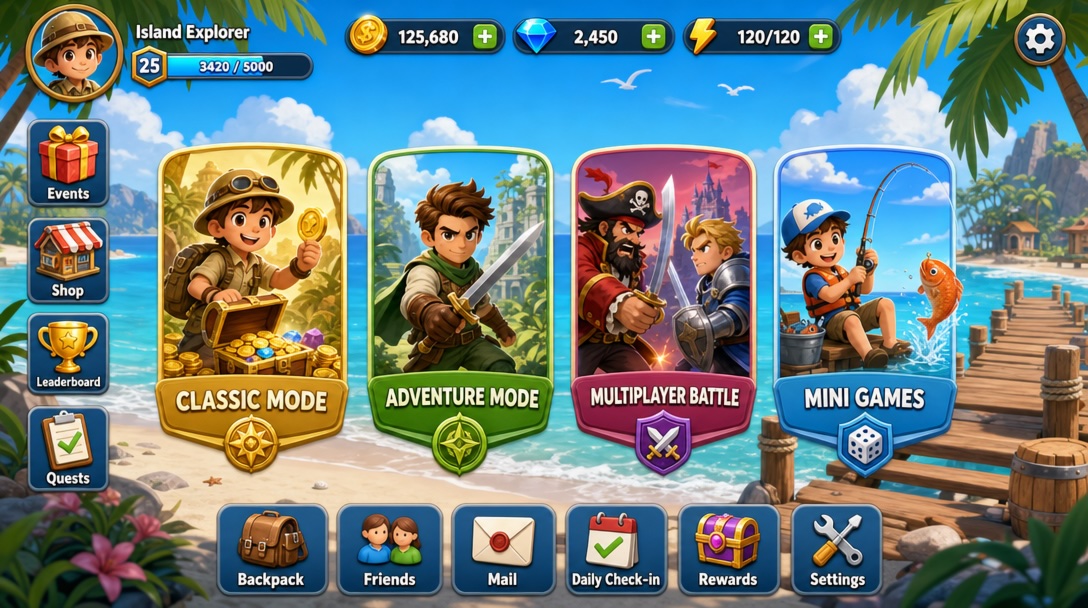
2. Place the full image on canvas and preview structure
After generation or import, the UI should appear in the game canvas preview. Check:
- Button, panel, and title regions have clear boundaries
- No obvious overlap, cropping, or artifacts (fix before split or export)
- Target engine (Unity / Godot / Cocos) is selected on the export side
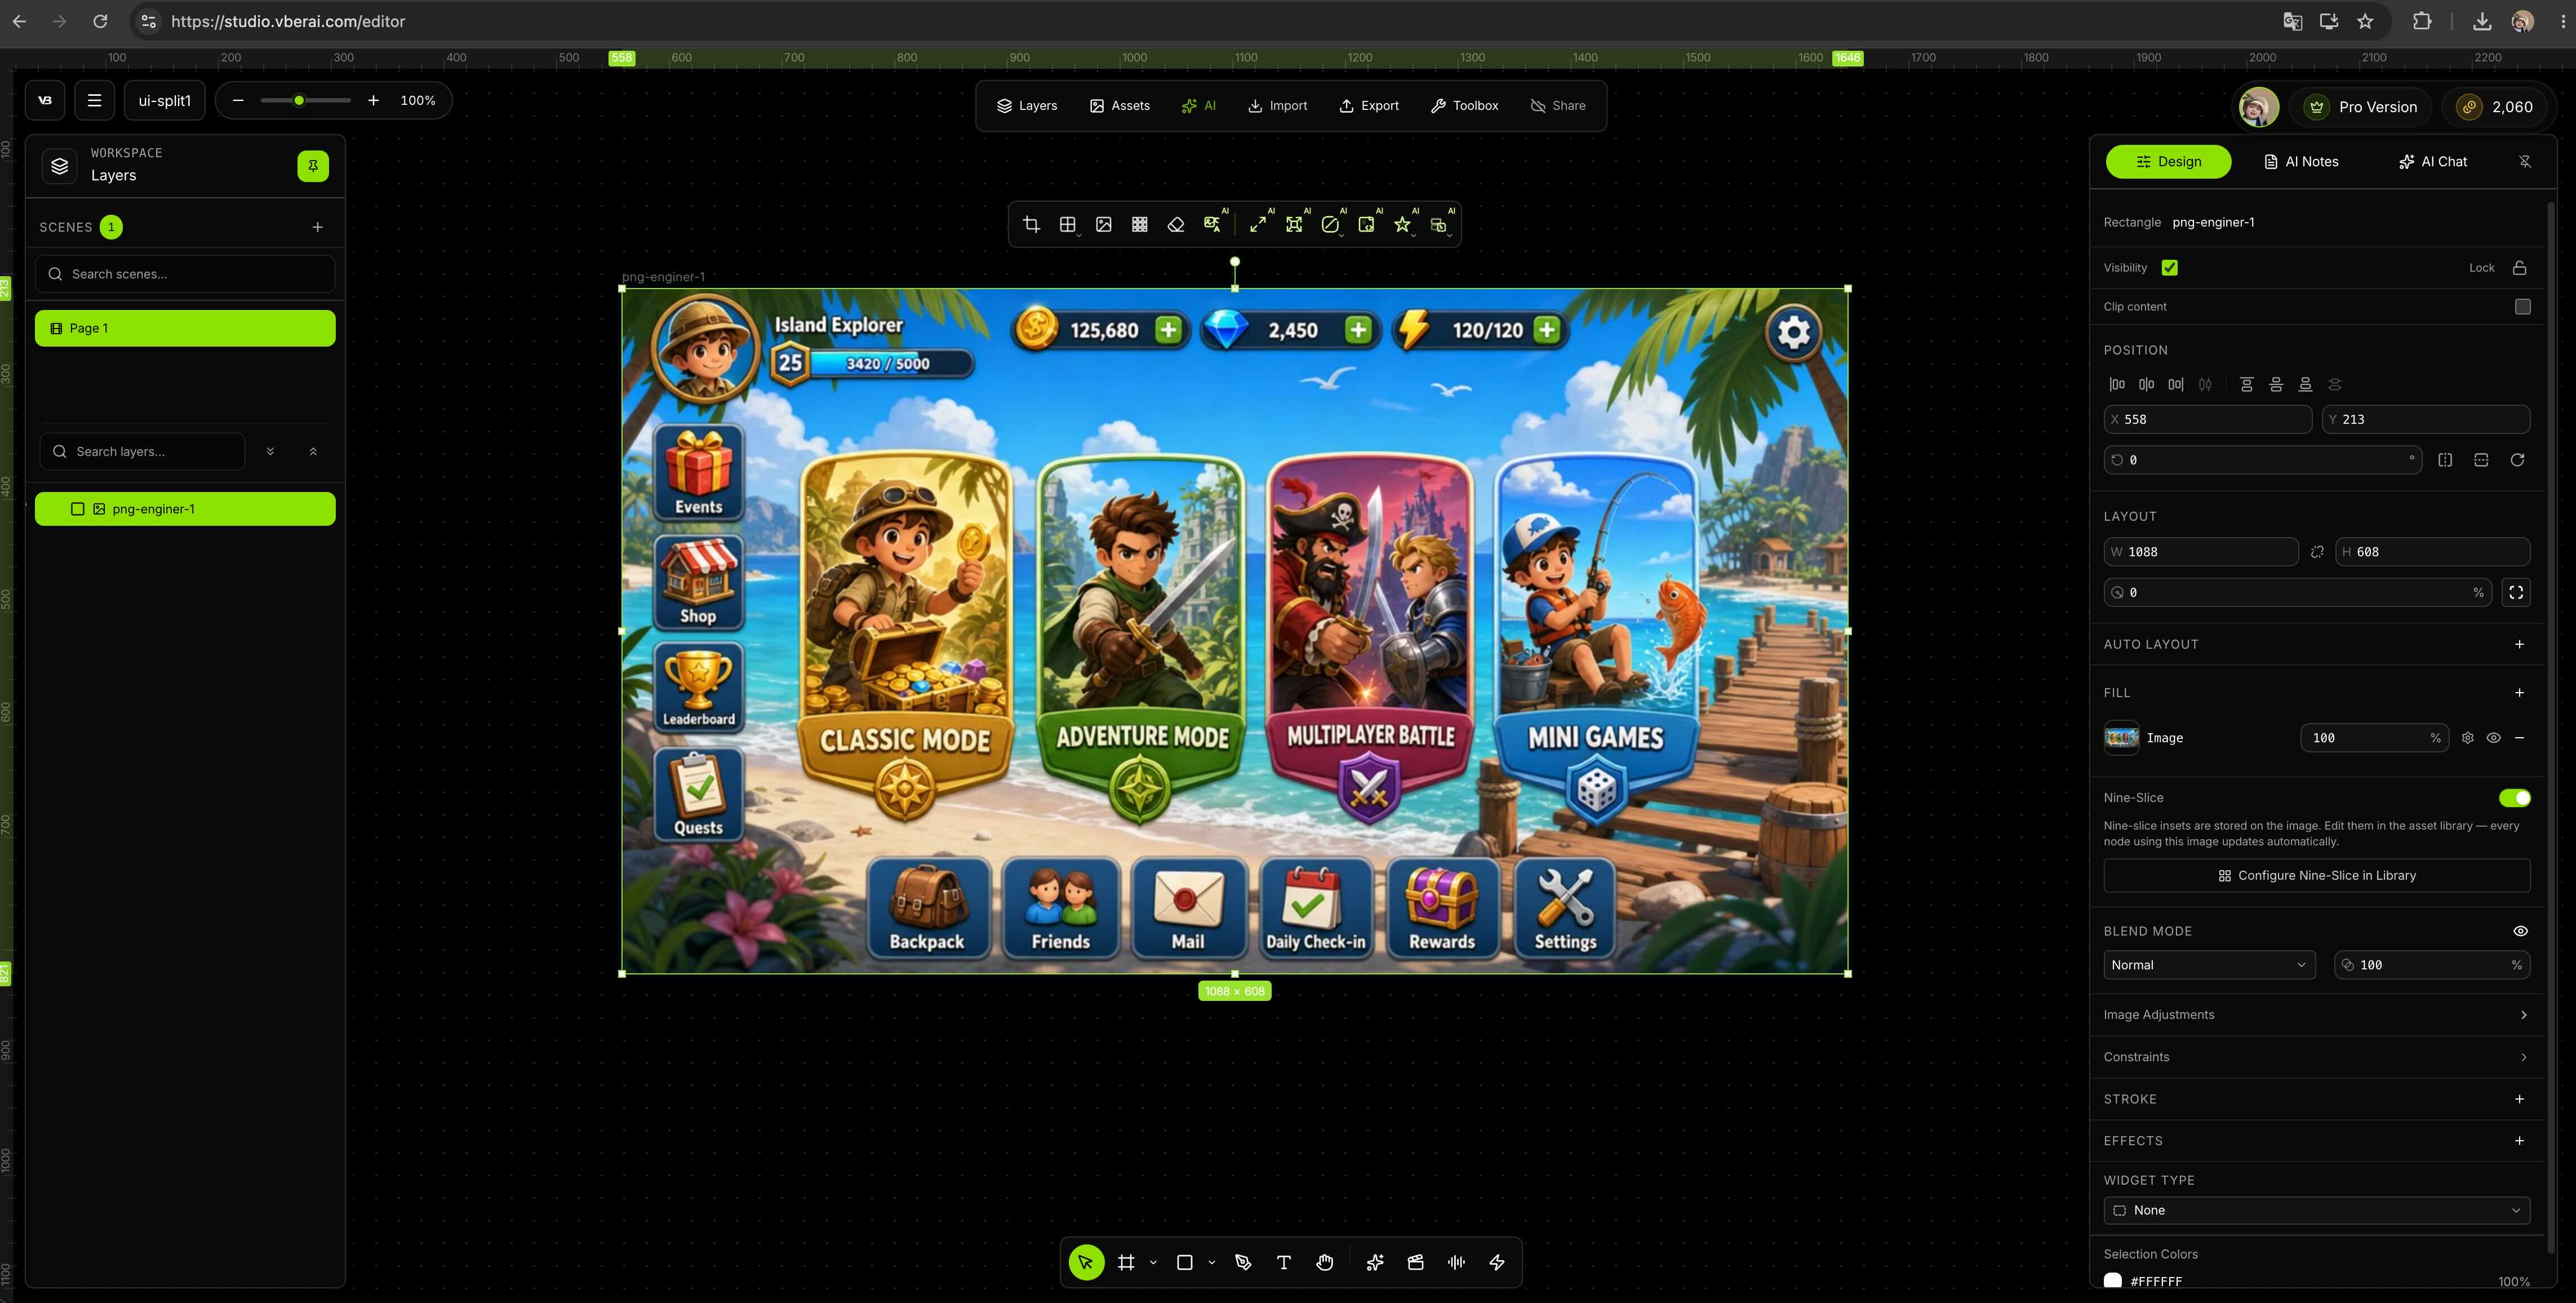
3. Split UI elements in their original positions
On canvas, run split / extract UI elements (exact UI copy may vary by product). Goals:
- Separate each clickable control (button, tab, list item) from decoration
- Keep original relative position and size so nothing drifts in-engine
- Layer panel should show named modules (for later rename and binding)
This is the core difference from “manually slice 20 PNGs in Photoshop and drag into Unity”: position data stays with the split.
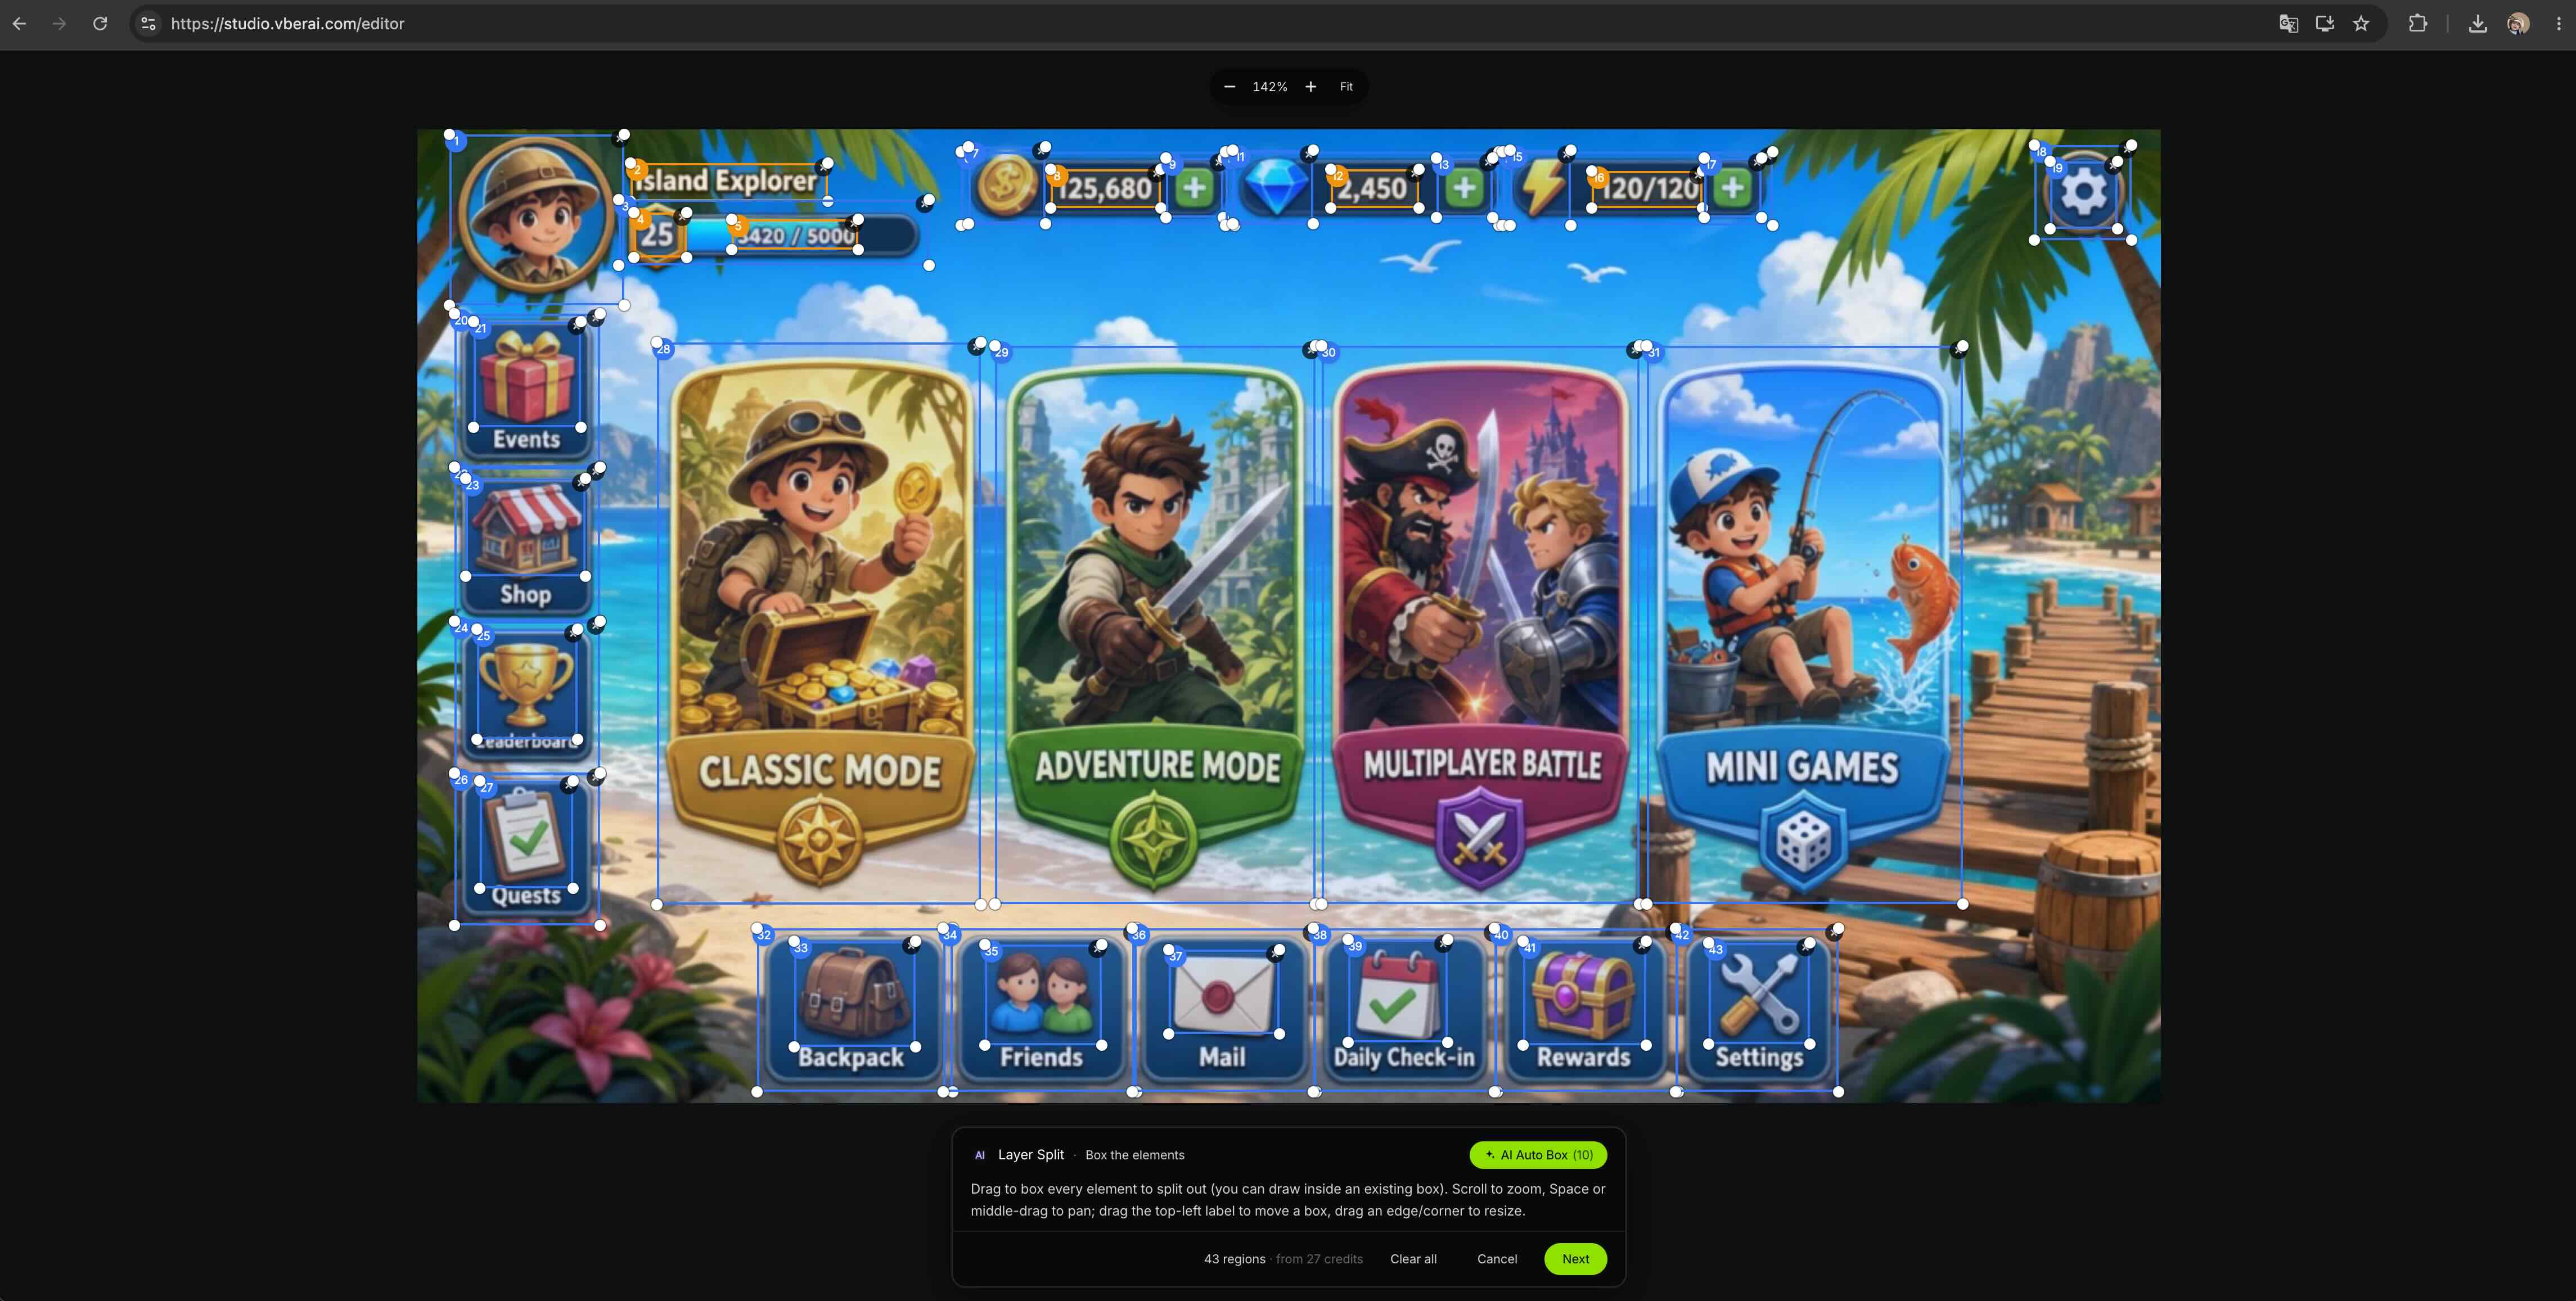
4. Check layers and naming before export
After splitting, confirm on canvas:
| Check | Notes |
|---|---|
| Hit area vs decoration | Button background and icon separated so hotspots stay accurate |
| Text layers | Titles you need to edit remain readable and replaceable |
| Stretchable backgrounds | Panel nine-slice / backgrounds suit different resolutions |
| Naming | Node names are obvious in-engine (e.g. Btn_Start, Panel_Shop) |
Adjust spacing or hide draft layers before import when possible—splitting after prefab landing costs more.
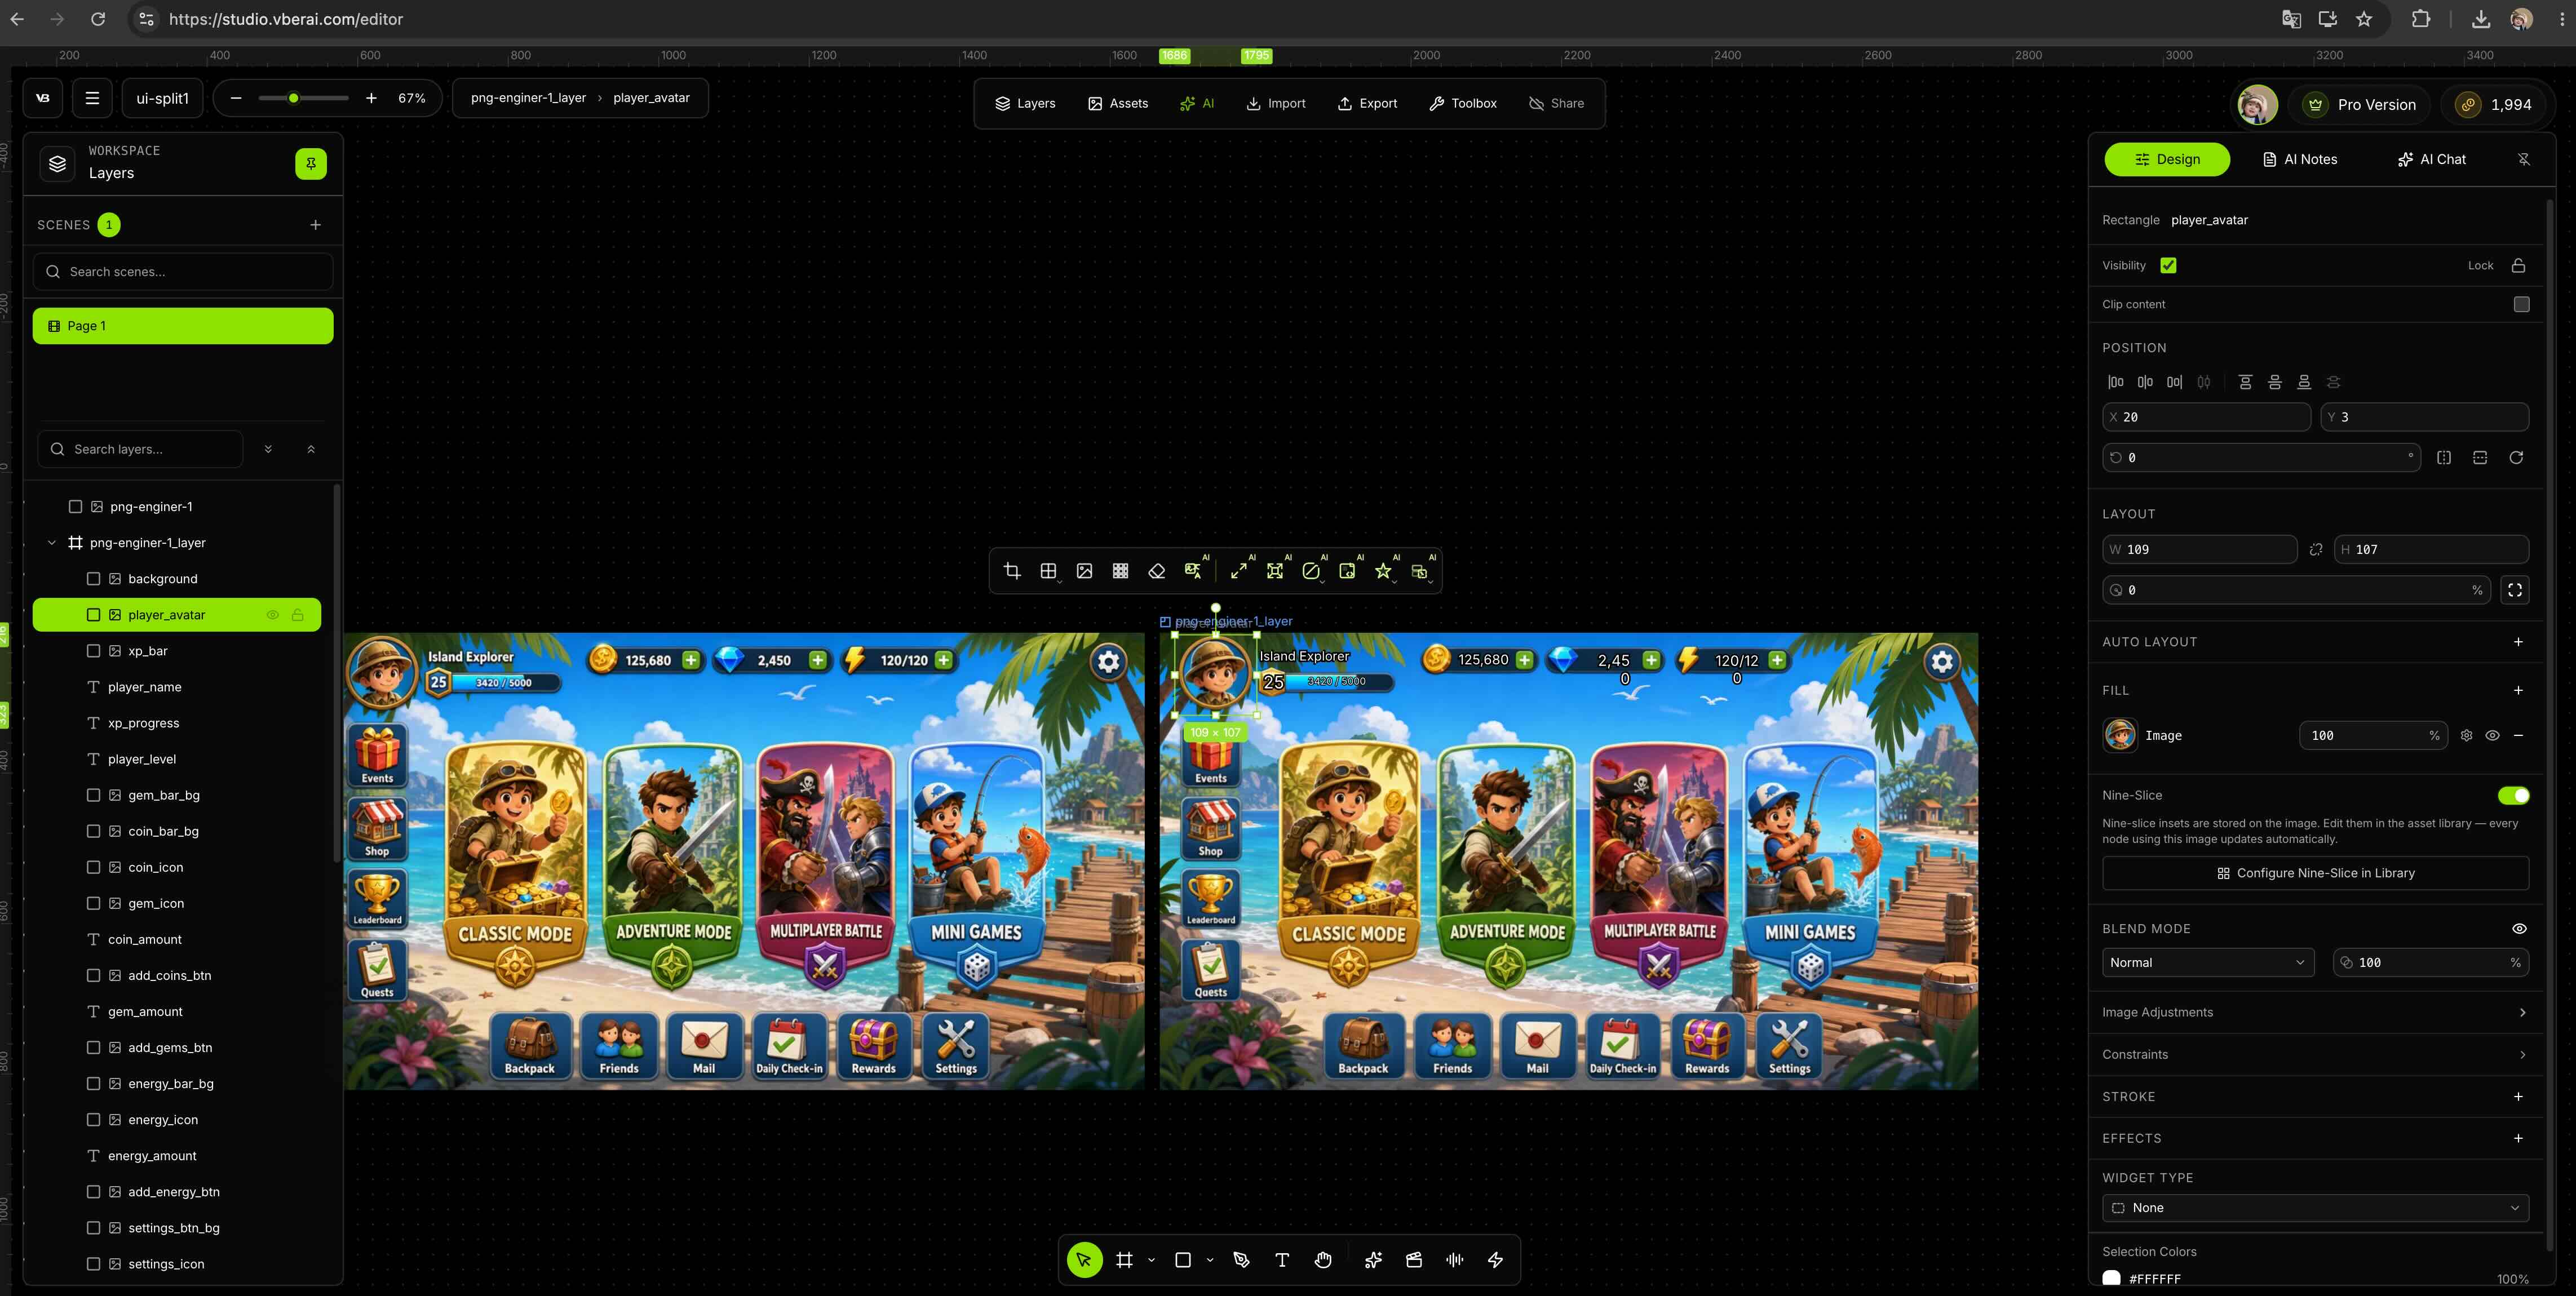
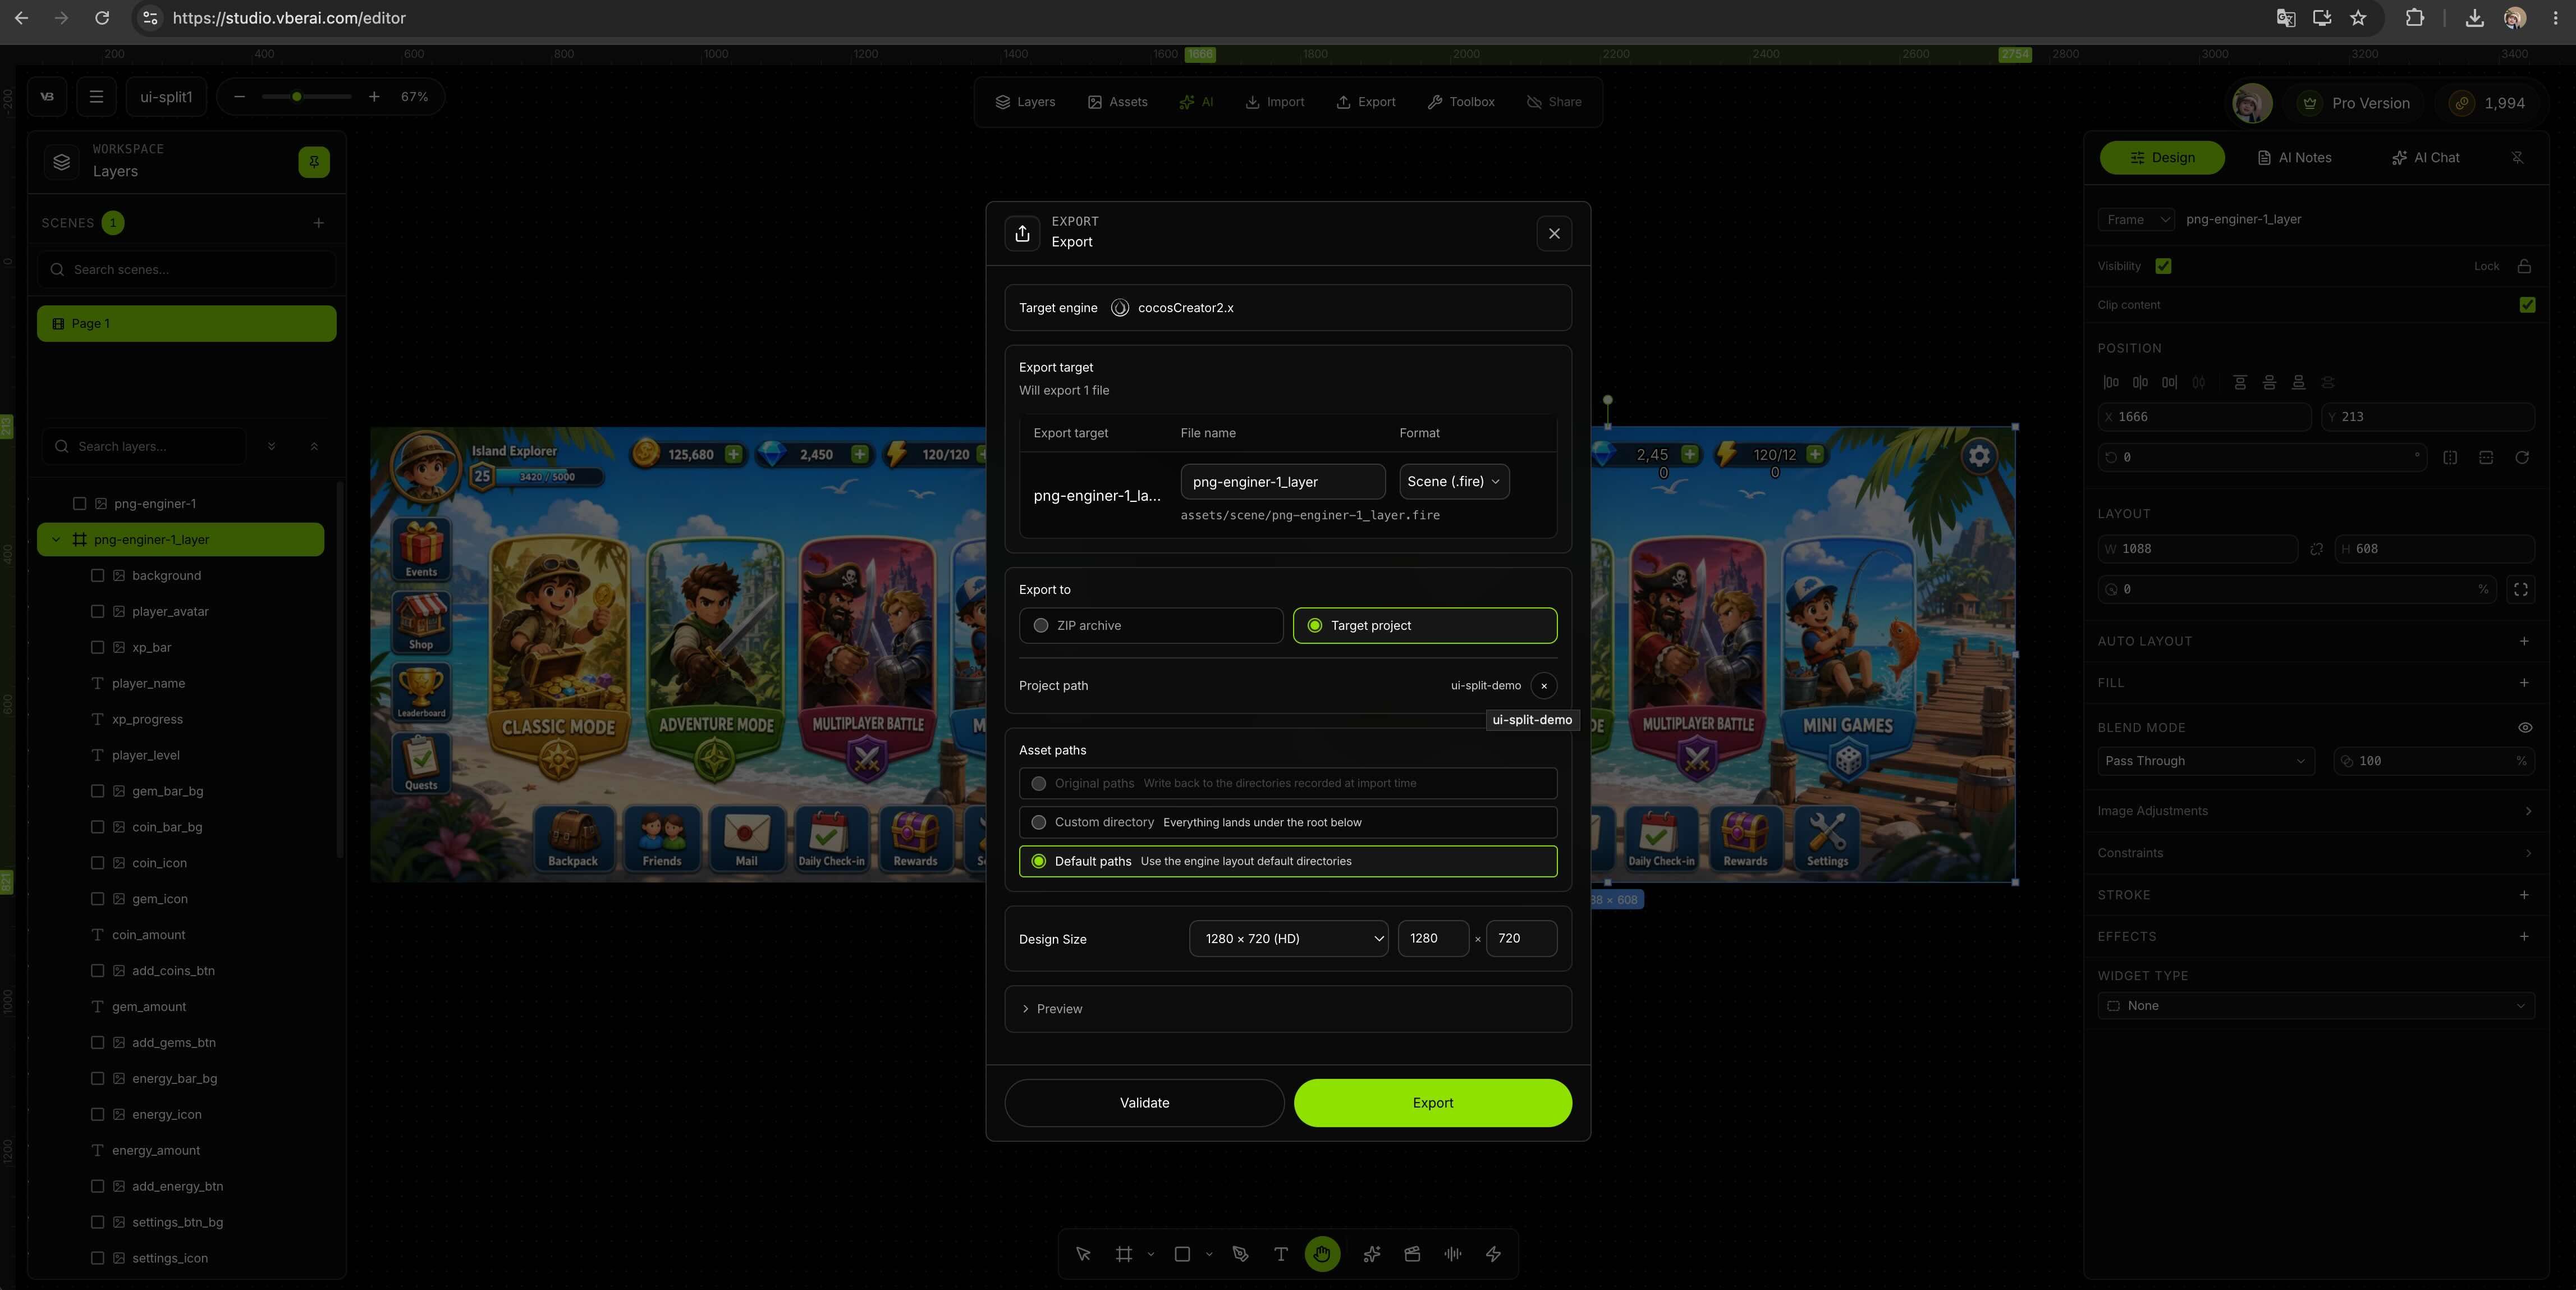
5. Choose target engine and export / push
Pick Unity, Godot, or Cocos Creator. Prefer UI hierarchy / prefab output—not only a loose image folder (unless you only need an asset pack).
- Unity: Import under
Assets/UI/or your convention, attach under Canvas, check RectTransform and Layout Group - Godot: Attach under a Control root, check Theme, anchors, and
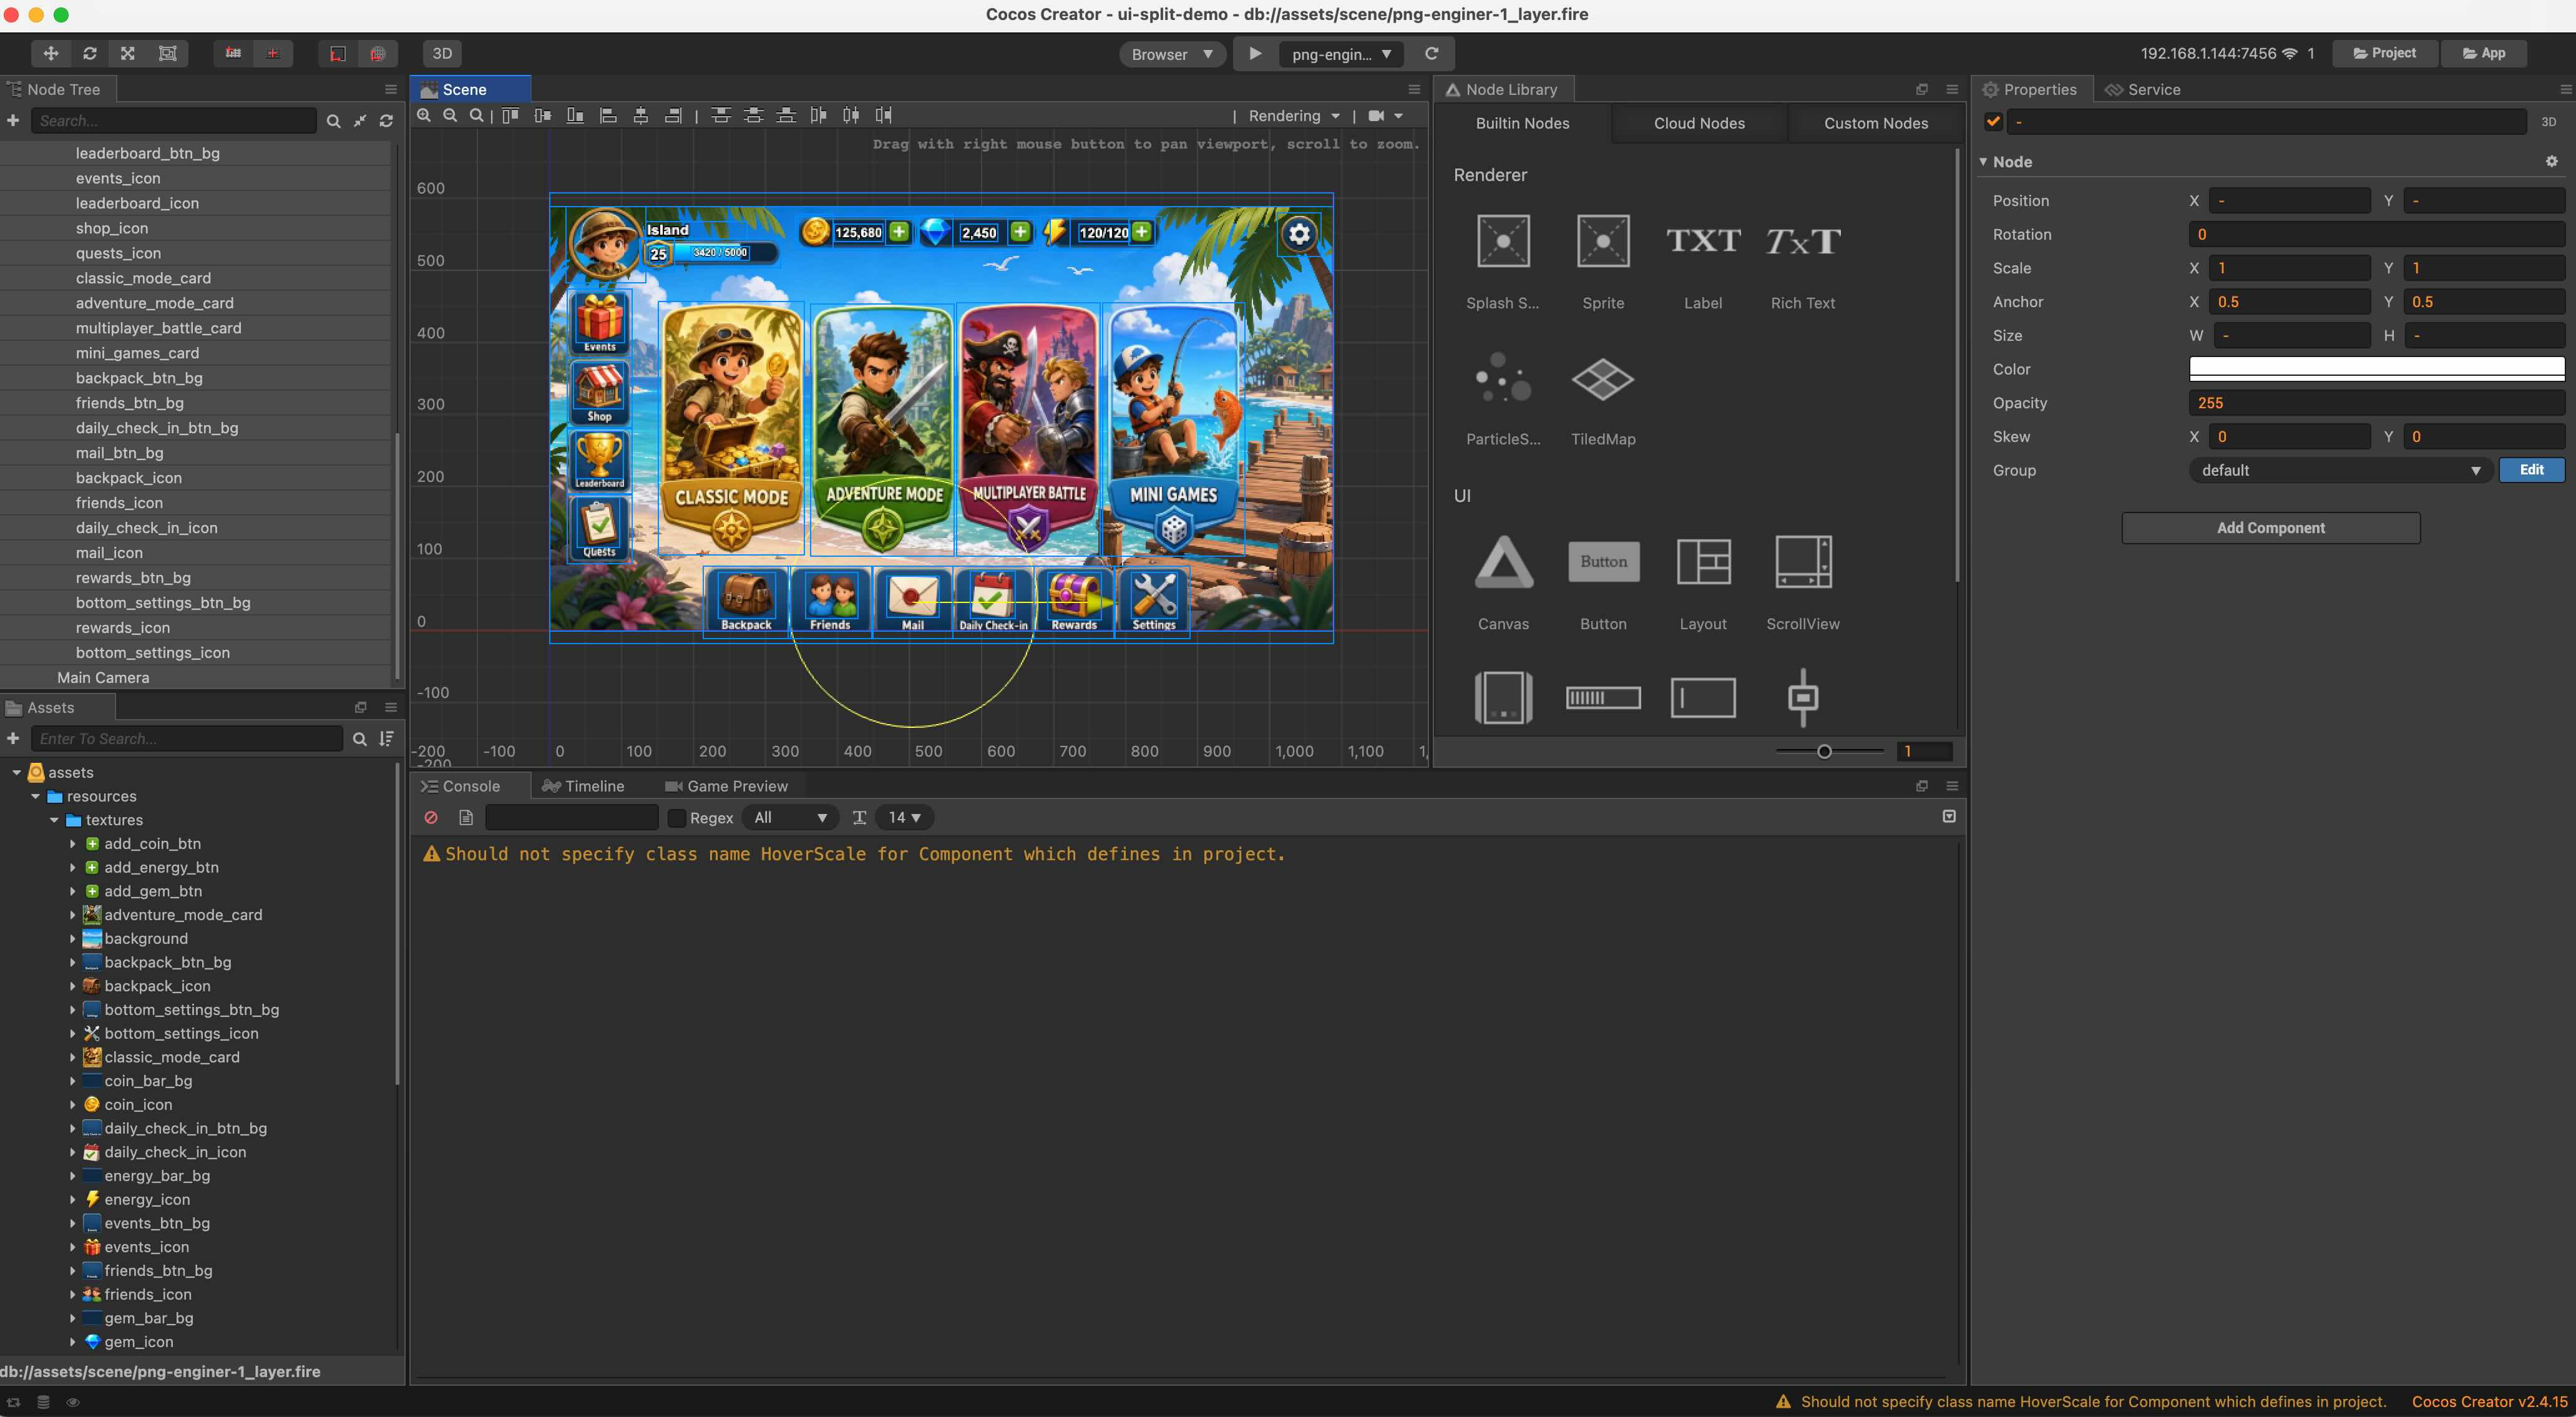
minimum_size - Cocos: Check Widget, Layout, and Button components
If the product supports push to an open project, manual copy may be reduced; follow the current Studio panel.
6. Verify layout, then wire logic with Engine MCP
After the export lands in your project, work in two layers: validate UI structure first, then use MCP so an AI client generates interaction and gameplay wiring—you do not need to start from blank script files for every line.
6a. Layout and hit areas (smoke test)
- Open the generated prefab / scene UI root
- Play at 16:9 and your target portrait ratio; click through the main path (start, back, tab switch, etc.)
- Check fonts, safe area, localization placeholders; confirm button hotspots and no blocking layers
- If node names are messy, unify in-editor first (e.g.
Btn_Start,Panel_Shop)—MCP finds controls by name later
6b. VberAI Engine MCP + AI editor wiring (recommended)
VberAI Studio handles “static concept → structured UI assets”; button callbacks, page navigation, and binding to health / inventory gameplay data can go to VberAI Engine MCP in an already open engine project. In Cursor, Claude Code, or any MCP-capable client, describe intent in natural language, for example:
- “Wire
Btn_Startclick to load logic on sceneMainMenu” - “Shop list item click opens
Panel_Detailand refreshes price text” - “HUD health bar updates fillAmount when
PlayerHealthchanges”
MCP operates the editor node tree, component references, and script attachments directly—generating or editing C# / GDScript / TypeScript in-project—closer to Play-ready acceptance than pasting code from chat.
| Target engine | MCP install & setup |
|---|---|
| Unity | Unity MCP install; client setup: Cursor / Claude Code + Unity MCP |
| Godot | Godot MCP install & enable |
| Cocos Creator | Overview: What is Cocos Creator MCP; install: 3.x, 2.x; video: Cocos MCP setup tutorial |
Full example after Studio export (Unity HUD bound to health): Bind AI Studio HUD to health events with Unity MCP. End-to-end chain: AI Studio + Engine MCP workflow.
Division of labor: AI Studio solves packaging and layering; Engine MCP solves in-editor logic, signals, and scene edits after import—same pipeline, neither UI structure nor gameplay scripts need a fully manual rebuild from zero.
Pre-engine acceptance checklist
- Split completeness — main buttons, close keys, list items present; no stuck-together regions
- Position and size — match canvas preview; no global drift
- Alpha and edges — icons cleanly keyed; preprocess with AI background removal if needed
- Resolution and safe area — notches and ultrawide do not clip key controls
- Hit areas — clickable region larger than decorative art; no mis-taps
- Engine attachment — Unity Prefab, Godot PackedScene, Cocos prefab references intact
How this fits with other VberAI Studio paths
| Your starting point | Likely path |
|---|---|
| Layered Figma / PSD | Figma→Unity, Figma→Godot, PSD→Unity |
| Full-screen game UI design (AI output, mockups) | This article: design image split into engine |
| AI video for skills / VFX / run cycles | Sequence frames and trailers into engine |
| Batch rename and signal bind after import | Unity / Godot / Cocos Engine MCP (see AI tool taxonomy) |
Paths stack: full-screen UI design → Studio split → Engine MCP for wiring and scripts in an AI editor.
Limitations
- VberAI Studio does not generate gameplay rules itself; post-import scripting and node binding can go to Engine MCP + AI editors instead of all-handwritten code.
- Design whole images rarely export pixel-perfect on first pass; fonts, localization, and motion still need in-engine polish.
- Split quality depends on source clarity; blurry control edges or chaotic layers may need re-export or manual fix.
- MCP operates an open project object tree; complex combat formulas, net sync, and Timeline cutscenes still deserve human review in-engine.
- Full name VberAI Studio ≠ Google AI Studio — see comparison.
Summary
The usual waste with game UI is rebuilding a non-clickable design whole image by hand in-engine, then hand-writing every line of UI logic. VberAI Studio puts full-screen UI design → split in place → Unity / Godot / Cocos delivery on one game canvas; after import, stack VberAI Engine MCP in Cursor and similar AI editors to bind buttons and iterate scripts in natural language. Official demo: YouTube qIh4TY0rpxA. Product entry: AI Studio.
FAQ
Can VberAI Studio import game UI design images into Unity / Godot / Cocos?
Yes. Place a full-screen UI design (AI output or art mockup) on canvas, split UI elements, keep layout and sizing, then export or push prefab / hierarchy for the target engine.
How is VberAI Studio different from dropping a PNG on Canvas?
A single PNG has no editable hierarchy or preserved positions; VberAI Studio outputs split UI modules and engine structure, reducing manual slicing and RectTransform / Control tree rebuild.
Is this the same as Figma / PSD import?
Same AI Studio canvas, different input: Figma / PSD use already layered vector / design files; this article covers full-screen UI design images (flat comps). Prefer Figma / PSD when you have full layers; use this path for full-screen mockups or AI output only.
How do split buttons become clickable?
Confirm clear node names in-engine first. Then connect VberAI Engine MCP in Cursor / Claude Code and describe bindings in natural language (start game, open shop, etc.)—MCP attaches Button / signals and generates or edits scripts in-editor. Unity example: HUD bound to health; Cocos install: 3.x MCP, 2.x MCP.
Do I still hand-write all logic after import?
No. Studio handles UI structure and assets; Engine MCP generates scripts and component refs in an open project via AI editors. Complex gameplay still needs human review and Play acceptance.
Is this the same as AI video frame splitting?
No. This article is static UI screen splitting; skills, run cycles, and VFX loops use video → frames into engine.
Is VberAI the same as Google AI Studio?
No. VberAI Studio is a game asset canvas; Google AI Studio is a general model playground. See Google AI Studio vs VberAI.
Is there an official walkthrough?
Yes: Turn AI-Generated Game Art into an Interactive UI, channel VberAI for Game Dev.
What to check on first export?
Split completeness, button hotspots, multi-resolution anchors; theme fonts and localization usually need another pass in-engine.
Keep reading
More guides you might like
Game UI Locale Overflow: Design Headroom and VberAI Studio Translate Export QA
How to fail/pass when German or Spanish copy breaks buttons and lists, how to reserve width in design, and how to compare locales on the VberAI Studio canvas before full-tree re-export—extends handoff and pre-ship checks with fix paths.
- game-ui-design
- game-dev-ai
- ui-localization
- i18n
PSD to UI Importer for Unity: Import PSD in 5 Minutes with AI Studio
PSD to UI importer for Unity: layered PSD to prefabs with VberAI AI Studio—structure import, psd to unity tips, re-import vs patch.
- vberai
- ai-studio
- unity
- psd
Automated Game Testing with an AI IDE + Engine MCP: A Practical Path
For Unity, Godot, and Cocos projects: use Cursor (or similar) with engine MCP for repeatable smoke checks, convention audits, and test scaffolding.
- game testing
- MCP
- AI IDE
- automation